If you are like me, you hate to throw things away; especially when you love them or know that there is plenty of life left in them. This summer I was swimming through ideas online on all these fun projects to do and cheap remodeling inspirations. I did not get to really put my list together because this seemed to be the year of people having babies and hosting baby showers, others getting married or renewing their current vows and out of state family on both sides spending weeks with us each at different times. Don't get me wrong, its nice to stay busy and we've had a blast but I could only fit in one of my projects and that was making drapes.
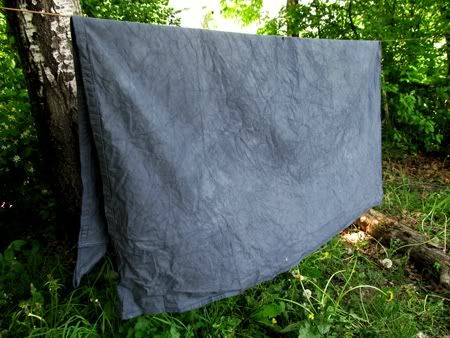
You can see here how my sister and I made the drapes from a canvas painters drop cloth from MyTarpsNow.com. Let me know what you think! We used Rit Dye to give them that beautiful slate greyish / blue color and I have gotten so many compliments on them already and they aren't even finished yet.
When we first decided to do this project, we knew that we needed a heavy material, so canvas was our best bet. And since we were dying canvas, we worried about how difficult the dying process would be. Would the extra thickness make dying harder? Would the canvas be hard to maneuver inside our dying container? Would we be able to find a container large enough to put the over-sized material in? Would the off-white and slightly speckled color of the canvas interfere with the dying process?
Well, I'm happy to report that the size and thickness of our material didn't cause too much of an issue. At first we thought that it may not be dying well, but after letting it soak a little longer, we found that the Rit Dye penetrated the fabric just fine. We did have slight trouble maneuvering the material inside our plastic totes because of the weight and rigidity of the canvas, but it was pretty easy to fix the spots that didn't dye well by just finding the spots and coating them with in the dye mix. We could tell by this little mishap that the dye would work great for tie-dye projects!
We decided t throw in some old stained clothes while we were at it and are we ever glad we did! It brought new life into those clothes. My sister ended up saving a maternity shirt and a pair of stained leggings and I ended up with a whole new shirt and a dress that was kinda see-through before but isn't now.
Lots of people are quite familiar with Rit Dye but this was my first ever hands on experience with it. If I didn't have the help of the nicest lady ever working with them and my sister to make sure I didn't screw it up, the color may have ended up way off. It does involve some math skills to get the right color. For instance, if you have 5 lbs of dry fabric that needs dying, you will need different amounts of dye than only 1 lb. of fabric.
One of the first things that we noticed about Rit Dye was the price. My sister said that she saw it in her local Walmart for under $3 a bottle. One bottle dyes up to 2 whole pounds of fabric. We thought that was a fantastic price.
I do want to stress to listen to the advice on wearing gloves unless you want to live out the I Love Lucy episode where Lucy and Des have black hands when they go to a ball. Overall, I was definitely impressed with Rit Dye in everything from it's ease of use to it's rich beautiful color but even more impressed with the fantastic customer service and help I got from Dianne at Rit. She has been dyeing material for a while and was a huge help to us. I will definitely be buying some in the future and I can't wait to find our next project to start.

I received this product for the purpose of review. The opinions in this post are 100% my own and may differ from yours.


0 comments:
Post a Comment