Showing posts with label Rit Dye. Show all posts

Wednesday, July 25, 2012

Give your old items new life with Rit Dye!


If you are like me, you hate to throw things away; especially when you love them or know that there is plenty of life left in them. This summer I was swimming through ideas online on all these fun projects to do and cheap remodeling inspirations. I did not get to really put my list together because this seemed to be the year of people having babies and hosting baby showers, others getting married or renewing their current vows and out of state family on both sides spending weeks with us each at different times. Don't get me wrong, its nice to stay busy and we've had a blast but I could only fit in one of my projects and that was making drapes.

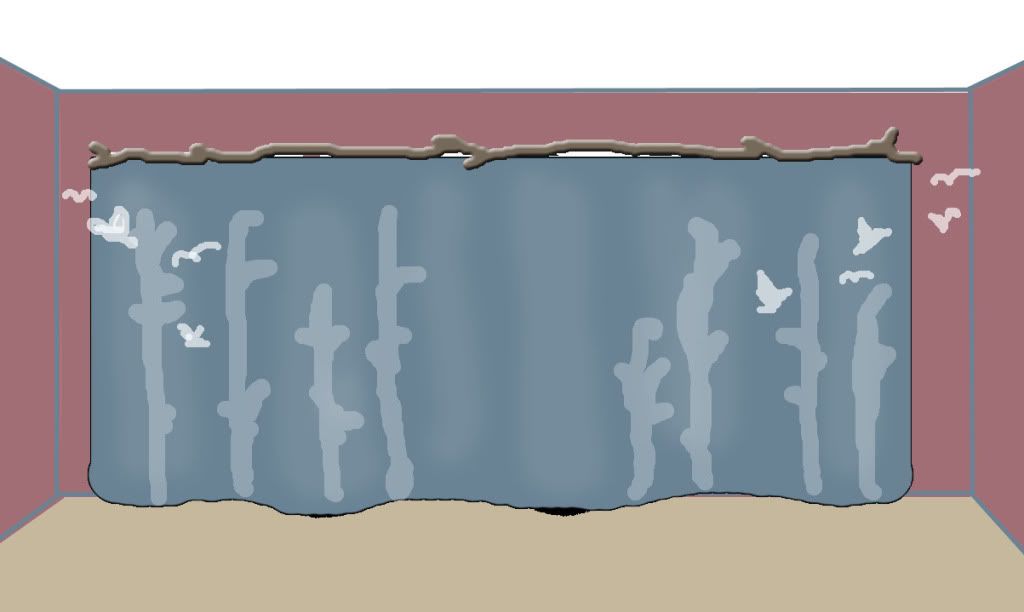
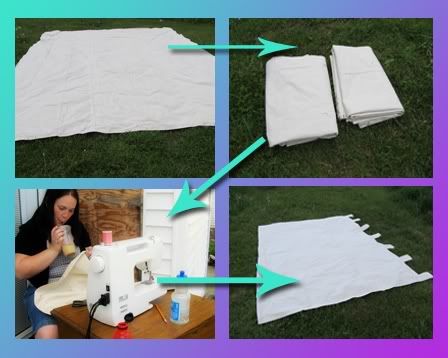
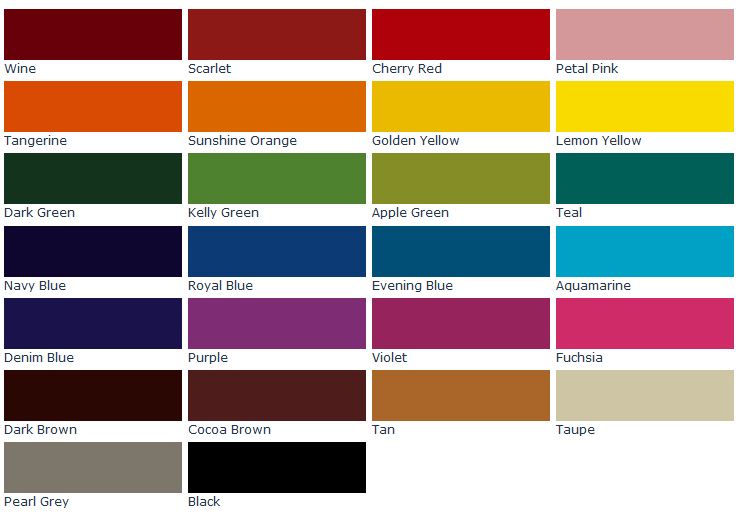
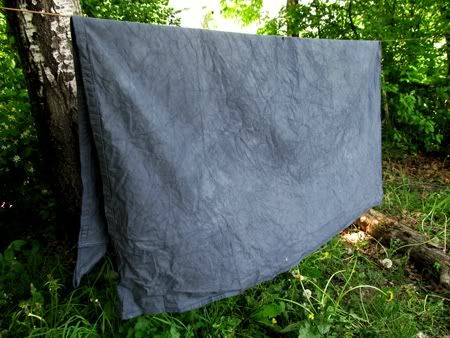
You can see here how my sister and I made the drapes from a canvas painters drop cloth from MyTarpsNow.com.  Let me know what you think! We used Rit Dye to give them that beautiful slate greyish / blue color and I have gotten so many compliments on them already and they aren't even finished yet.


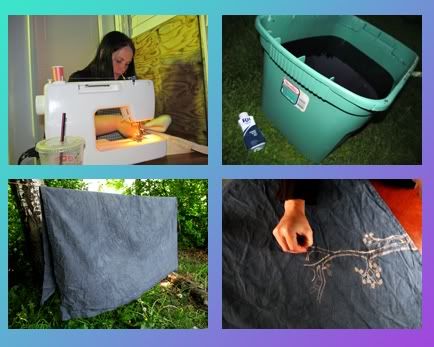
When we first decided to do this project, we knew that we needed a heavy material, so canvas was our best bet.  And since we were dying canvas, we worried about how difficult the dying process would be.  Would the extra thickness make dying harder?  Would the canvas be hard to maneuver inside our dying container?  Would we be able to find a container large enough to put the over-sized material in?  Would the off-white and slightly speckled color of the canvas interfere with the dying process?


Well, I'm happy to report that the size and thickness of our material didn't cause too much of an issue.  At first we thought that it may not be dying well, but after letting it soak a little longer, we found that the Rit Dye penetrated the fabric just fine.  We did have slight trouble maneuvering the material inside our plastic totes because of the weight and rigidity of the canvas, but it was pretty easy to fix the spots that didn't dye well by just finding the spots and coating them with in the dye mix. We could tell by this little mishap that the dye would work great for tie-dye projects!

We decided t throw in some old stained clothes while we were at it and are we ever glad we did! It brought new life into those clothes. My sister ended up saving a maternity shirt and a pair of stained leggings and I ended up with a whole new shirt and a dress that was kinda see-through before but isn't now.

Lots of people are quite familiar with Rit Dye but this was my first ever hands on experience with it. If I didn't have the help of the nicest lady ever working with them and my sister to make sure I didn't screw it up, the color may have ended up way off. It does involve some math skills to get the right color.  For instance, if you have 5 lbs of dry fabric that needs dying, you will need different amounts of dye than only 1 lb. of fabric.

One of the first things that we noticed about Rit Dye was the price.  My sister said that she saw it in her local Walmart for under $3 a bottle.  One bottle dyes up to 2 whole pounds of fabric.  We thought that was a fantastic price.

My step son has been tie-dyeing with his mother for quite some time and loves making clothing but did you know that you can die buttons and beads as well? Rit Dye can really be used in so many different projects.  I was blown away by some of the things we found on the Rit Projects pages. Check out these dyed golf balls.


I do want to stress to listen to the advice on wearing gloves unless you want to live out the I Love Lucy episode where Lucy and Des have black hands when they go to a ball. Overall, I was definitely impressed with Rit Dye in everything from it's ease of use to it's rich beautiful color but even more impressed with the fantastic customer service and help I got from Dianne at Rit. She has been dyeing material for a while and was a huge help to us.  I will definitely be buying some in the future and I can't wait to find our next project to start.


I received this product for the purpose of review. The opinions in this post are 100% my own and may differ from yours.

Making nice rugged drapes with a drop cloth and Rit dye...Making Drapes: Part 1

Wow! This was supposed to be up ages ago but boy has it been the pits here lately... as in the movie the Money Pit! I have dealt with no electricity, water and car. I have my father came from out of state and my well pump decides to quit right before he gets here. So for 2 and 1/2 days of his visit he has dealt with bottled water. My son jumps off a table with no shoes and lands on a cut sapling and lands up with crutches and staying off his foot for a month. Then my husbands side comes to visit and I'm going to a restaurant with them and a UPS truck, of all things, jumps out in front of me. I slam on the brakes and feel a snap... the brake line breaks. I swerved around the ups truck and I barely get the car to stop before the train tracks that actually has a train going on it. What's funny is that I haven't seen a train on that track in all the years I have lived here! I am glad things are looking up now, I am still without a car, but I am all for distracting myself and decided to give my livingroom a makeover. First project that we started earlier this summer is... drapes made out of a canvas drop cloth, Rit dye and bleach. Why a drop cloth? Well, for one it is a heck of a lot cheaper than drapes! It is durable and you can do SO much with canvas! You can dye it, paint it, sew appliques on them or leave them natural. I will be doing more projects with canvas as well but for now it's covering the windows.

First off, I want to thank my two sponsors for this particular project. The all natural canvas drop cloth came from Tarps Now where you can get wholesale tarps at up to 70% off, custom tarps and covers. You can purchase canvas by the yard which is great for custom projects like this. I received 12' x 15' and it was enough to do all the windows in my livingroom and I have some left over where I am going to be doing a custom canvas painting over my couch. That project will be up later. You can get a 12' x 16' all natural canvas tarp from Tarps Now for $56.54. That is a fantastic price for heavy duty drapes! Here is a (very primitive) drawing of what I imagined up for the overall looks of the drapes I wanted to do. The squiggly lines are trees and the birds would look like they are flying off the curtain onto the wall since I am planning on painting them.


The other sponsor I want to thank is Rit Dye. Not only did I get great fabric dye (and we are all pretty familiar with the brand!) but I got a lot of advice that helped me tremendously. This was my first dye project and I was nervous but Dianne was super nice and truly boosted my confidence to proceed! Don't hesitate to email Rit when you get stuck. When you get the hang of the dying process the possibilities of different projects are endless.

Turning the drop cloth into drapes:


First we measured all the windows and drew our plan out so we could save as much canvas as we could. As you can see from the pictures we had LOTS of help from the kiddies and dog! I guess they wanted their art work included. Anyway, *growls* we got the canvas cut and cut the left over fabric into tabs to hang the drapes from. Since I will be hanging these from a poplar tree, I want the tabs nice and roomy.


After hemming all the drapes and adding the tabs (thank you sis!) it was time to figure out the formula for the dye. This is probably the most tricky part to the whole project. Me with my amazing math skills... yes that was sarcasm, was having some trouble figuring it out and then we made a big boo boo with the water amount, so we needed to add more. We ended up with a shade that was very close to the color pictured when I first thought of this project so I was very happy. I got a slate greyish color. However, we did come across a little problem... if you get untreated all natural canvas, you need to not only keep in mind the inches for the hem but also the shrinkage. This drop cloth shrunk more than I would have anticipated. So definitely keep this in mind when doing something like this! To fix this, we added more to our tabs and I will probably add a bottom fringe at some point. For right now, it will do and it covers the windows.

After we dyed all the drapes, it was time to wash them thoroughly and let them dry because I still have work to do :)  I will get into the details of this in my part 2 to the project but you get a preview in the last picture shown above. We have featured a couple different projects with this processing... (another clue!) I will also let you know my thoughts on how the whole thing went and show you what we did with the curtain rod and share some tips on preventing what mistakes we made or what might work better. Keep your eyes peeled, part 2 will be up soon! Thanks for reading!


I received this product for the purpose of review from Rit Dye and Tarps Now. The opinions in this post are 100% my own and may differ from yours. Please, FORGIVE me for being so slow at putting this up!

Related Posts Plugin for WordPress, Blogger...